What iFreeUp Solves Before You Press Clean
Storage runs out on iPhone, iPad, and iPod devices long before users feel ready to delete anything. The instinct is to start clearing photos, music, or app data by hand, which risks removing files that matter. A cleaner approach separates disposable junk from content worth keeping, and that separation is the problem iFreeUp is built to handle.
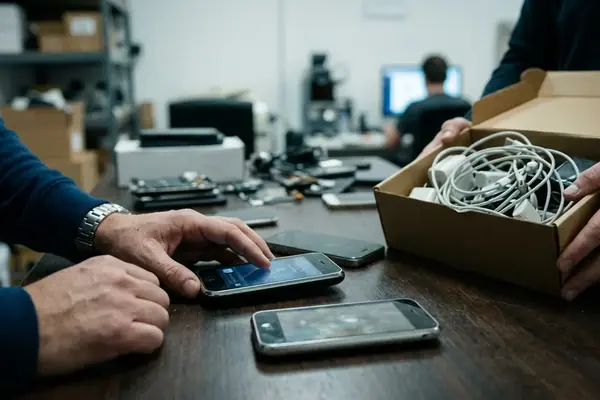
iFreeUp is an iOS management tool for Windows PCs, developed by IObit, with product history that traces back to its 2015 copyright reference. It connects to a device over USB and gives a structured view of what occupies storage rather than a single delete-everything button.
Three jobs frame the rest of this guide. Quick Clean removes junk without asking the user to sort media by hand. File Manager browses and transfers Apps, Photos, Music, and Videos. Secure Deletion shreds files for privacy when ordinary deletion is not enough.
Connection Basics: PC, iTunes, and Device Trust
Before any cleanup runs, the setup has a short list of requirements: a Windows PC, iFreeUp installed, a compatible iOS device, a working USB cable, and iTunes present as the supporting connection software.
Why does iTunes matter when the cleanup happens inside iFreeUp? iTunes installs the Apple device components that let a Windows PC recognize and talk to the iPhone, iPad, or iPod. Without those components, detection often fails outright. The setup sequence here follows the minimum software dependencies documented for device recognition, which means iTunes installation comes before the first USB connection rather than after.
The connection checklist is short and worth following in order:
- Unlock the device so the screen is active.
- Respond to the Trust prompt if it appears.
- Keep the USB cable attached throughout scanning, transferring, and deletion.
- Do not disconnect mid-operation, since the cable must stay connected through every scan and transfer step.
For Windows users who need to install or repair the Apple components, Apple's iTunes for Windows support guidance covers the official download paths.
Reading the Cleanup Targets: Junk, Crash Logs, and App Debris
The scan stage comes before the removal stage for a reason. A user who understands what a scan is likely to surface makes better choices about what to keep. Reading the results first is the difference between confident cleanup and guessing.
Application Junk Files
These are the leftover and useless files that app activity produces: caches, temporary storage, and residue left behind after updates. They accumulate quietly and rarely hold anything the user needs.
Crash Logs
Crash logs are records written when an application terminates unexpectedly. They appear only after such termination events, so a device with stable apps may show few of them. Developers and support staff sometimes use crash logs for troubleshooting, but for ordinary storage cleanup they are usually safe to remove.
The category list here was chosen to match observable iOS temporary storage patterns. It does not assume every device recovers the same amount, because recovery depends on how each device has been used.

Quick Clean Workflow for Freeing Space
Quick Clean is the main junk-removal feature and the right starting point when the goal is to free space without manually sorting photos, music, or videos. Use it first, then move to manual review only if more space is needed.
- Connect the device over USB and unlock it.
- Launch iFreeUp on the PC.
- Confirm the device appears as detected.
- Select Quick Clean.
- Review the scan categories the tool returns.
- Start the cleaning operation.
One step deserves more attention than the others. Before confirming deletion, review the selected categories, especially if the interface groups several app-related file types under a single broad label. A quick read of what is checked prevents removing something a particular app still relies on.
Field Note: If Quick Clean groups app files into one wide category, expand it where possible before confirming. The few seconds of review cost far less than re-downloading app data later.
File Manager Workflow: Apps, Photos, Music, and Videos
File Manager handles the content Quick Clean deliberately leaves alone. It manages Apps, Photos, Music, and Videos directly, rather than working through junk categories.
Most users open it with one of a few intentions: transfer iPhone files to a computer, review large media libraries before deciding what to keep, move photos off the device ahead of a cleanup, or inspect how much storage app content occupies.
A reliable working sequence keeps transfers safe:
- Open File Manager.
- Choose a category such as Photos or Music.
- Preview or select the specific files involved.
- Export or transfer the items you want to keep.
- Delete only after confirming the backup or transfer destination.
Transfer duration increases when media libraries exceed several thousand items, so large photo or video collections take time to move. Plan for that rather than disconnecting partway through.
Important: Verify transferred media on the destination computer before any permanent removal step. A file that appears copied is not safe to delete until it opens correctly on the PC or Mac.
Secure Deletion, Pro Features, and Compatibility Limits
This section sets boundaries the rest of the guide should not blur. iFreeUp carries several useful features, and a few of them sit behind paid access or device limits.
Secure Deletion is a Pro-only feature. It should not be described as part of every free workflow, because it is not. Users planning to shred files need to confirm they have the Pro version first.
File shredding, in plain terms, is a privacy method that overwrites or scrambles deleted files so they are harder to recover than with ordinary deletion. It raises the difficulty of recovery. Claims of absolute, guaranteed irrecoverability go beyond what the documentation supports, so treat secure deletion as strong privacy protection rather than a permanent erasure promise.
Compatibility carries its own caveat. Older configurations behave differently, and iOS 8.3 users in particular must recheck category availability after any system update, since an update can change what a scan surfaces. The legacy and Pro boundaries described here reflect documented product limits and external compatibility references rather than assumptions about how a given device will respond.
After-Cleanup Checks and Practical Troubleshooting
Verification closes the loop. After a cleanup or transfer, three checks confirm the work held.
- Check available storage on the device to confirm space was actually recovered.
- Confirm transferred files open on the PC or Mac, not just that they appear listed.
- Reopen key apps to make sure expected data remains in place.
When detection or connection fails
Connection problems are common and usually quick to resolve. Update or reinstall iTunes if the device is not recognized. Switch USB ports, unlock the iOS device, and replace a cable that looks worn or feels loose. Restart iFreeUp if detection still fails after a clean connection. One stubborn case worth knowing: detection fails on devices with modified file permissions, so a jailbroken or heavily altered device may not behave as documented.
When little space is recovered
Quick Clean only targets removable junk categories, so a near-full device after cleanup is not a malfunction. The remaining space is held by content, not junk. Open File Manager and inspect Photos, Music, Videos, and large app content to find what actually fills the storage.
Bottom Line: Run Quick Clean first for junk, use File Manager to reclaim space held by media and apps, and reserve Secure Deletion for the Pro privacy cases it was built for. Verify every transfer before deleting the original.