Most first-time users open iFreeUp with one goal: recover storage fast. The Settings screen feels like a detour. It is not. Before the first scan runs, those settings quietly decide how your device connects, where exported files land on your computer, and how cleanup actions get presented to you. Skip the review, and you may discover a default that sent transferred photos somewhere you did not expect.
This guide treats settings as documentation, not decoration. It is written for cautious users maintaining older iPhone, iPad, or iPod touch hardware from a Windows or Mac computer, where a wrong destination path or an unread prompt has real consequences.
Why the Settings Screen Matters Before the First Cleanup
The instinct is to connect, scan, and delete. The problem is sequence. Several iFreeUp choices affect backup locations, on-screen prompts, update behavior, and transfer destinations before any junk file is touched. Review them after cleanup and the review is too late to matter.
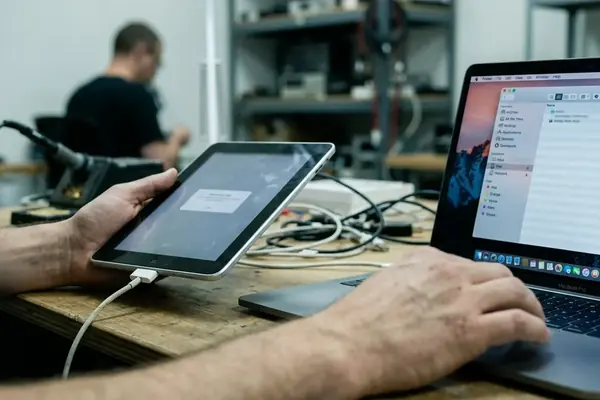
Consider connection timing. On iOS 16 devices, the trust prompt typically appears five to ten seconds after the cable is plugged in. If the software is configured to begin work immediately, you are reacting to prompts while the tool is already querying the device. Reviewing settings first slows that moment down to something you control.
In recent builds, the recommended workflow placed settings review ahead of the first scan for exactly this reason. The screen is short. The payoff is knowing where files go and what the tool will ask you before it asks.
Field Note: Open Settings once, read every category heading, and change nothing on the first pass. A read-only walkthrough builds a mental map before you start adjusting defaults.
What iFreeUp Settings Can and Cannot Control
It helps to draw a hard line between the desktop utility and the iOS device itself. iFreeUp guides cleanup and transfer workflows on the computer side. It does not replace Apple's device permissions, override iOS security prompts, or rewrite system-level storage rules. Those belong to the operating system on the phone.
The clearest example is trust. The connected device must accept the computer before any communication happens. If that trust is not granted within roughly thirty seconds of connection, the link fails and no setting inside iFreeUp can force it. You can read more about this prompt in Apple's guidance on the Trust This Computer alert.
One assumption worth correcting: not every iOS version presents the trust prompt the same way. The wording and timing shift across releases, so treat any single description as a sample, not a universal rule.
Setting names also drift. Exact labels can differ by iFreeUp build, by operating system, or by an older installation package on a legacy machine. Settings reviewed on macOS 14, for instance, may not match what appears under Windows 11. Read this article as a first-use decision guide, not a version-specific changelog.
The Main Setting Categories to Review First
Menus are organized by software logic. Your review should be organized by intent. Group the settings into categories that match what you are actually trying to decide.
- Connection behavior — how the device is detected and handled once plugged in.
- Scan and cleanup preferences, what the tool looks for and how it presents findings.
- File transfer destinations, where photos, music, app files, or exported data are written on the computer.
- Backup or recovery paths, where any backup-style output is stored.
- Language and interface options, display preferences that affect nothing destructive.
- Update notifications, whether the tool alerts you to new builds.
Connection settings come first in the sequence for a practical reason. If the device is not recognized, every cleanup and transfer option downstream is irrelevant. Get the handshake working, then move on.
Destination paths matter next. A change to the destination path applies to all transfers started after you save it. Confirm where exported files will go before you move a single photo or music file, not after you go hunting for them.
A Safe First-Time Configuration Workflow
- Install or open iFreeUp on the computer.
- Connect the iOS device with a cable you trust to be reliable. A flaky cable produces intermittent recognition that looks like a software fault.
- Respond to the iOS trust prompt on the device. Accept it within the connection window so the link holds.
- Open Settings before running any cleanup or scan.
- Review the download, export, or backup folder path. Change it to a location with enough free disk space.
That last step deserves attention on constrained systems. On a computer with in the ballpark of 50 GB free, create the export folder yourself before the first transfer rather than letting a default path fill a near-full drive. Point iFreeUp at the folder you made.
Update settings ask for a small judgment call. Keep update notifications enabled for current builds. The one reasonable exception is a legacy device or older operating system that depends on a known stable build, where staying put is the safer choice.
Cleanup and Transfer Options: When to Change a Default
Change cleanup-oriented settings only when you understand which category they touch. The tool typically separates removable items into temporary files, app caches, crash logs, and other junk it flags as safe to clear. Each category carries a different weight. Adjusting a setting without knowing the category is how accidents happen.
Draw a firm distinction between reviewing and removing. Scanning and previewing are low-risk: they read the device and report. Deleting is the higher-risk action. A preview scan finishes quickly — typically twenty to forty seconds for devices in the ballpark of 128 GB of storage or less, so there is rarely a reason to skip the preview and jump straight to removal.
For transfer settings, the safest change is almost always the destination folder. Leave the underlying file-handling behavior alone unless you have a specific reason to alter it. Moving the output location is reversible and obvious. Changing how files are processed is neither.
Backup, Restore, and Reversal Limits to Understand
A cleanup utility is not a backup strategy. Treating it as one is the most common mistake first-time users make. iFreeUp clears removable files; it does not stand in for a full device backup.
Before removing anything from the device, confirm that the files you care about already live somewhere safe. Check iCloud, Finder, iTunes, or whatever workflow you normally rely on. If a photo or document exists only on the phone, a cleanup pass is the wrong moment to discover that.
Reversibility has limits, and they are not generous. Depending on the file category and iOS behavior, some cleanup actions cannot be meaningfully undone from inside the utility. Files removed through the tool are not restorable from within iFreeUp after a window hovering around twenty-four hours. Assume a deletion is permanent and plan accordingly.
Important: Verify your backup status before your first deletion, not after. Once a category is cleared and the reversal window closes, the utility cannot bring those files back for you.
First-Use Checklist Before You Clean or Transfer
Run through this before any deletion on the first session. It takes minutes and prevents the failures that are hardest to fix.
- Device recognized by the computer.
- Trust prompt accepted on the device.
- Destination folder confirmed and pointed at the location you intend.
- Free computer storage checked against what you plan to transfer.
- Backup status known for anything you cannot afford to lose.
- Cleanup categories previewed, not just selected.
- No automatic deletion enabled on the first run unless you deliberately chose it.
Bottom Line: Treat iFreeUp settings as a safety layer, not a speed bump. The first-time goal is a clean, reversible, well-understood pass — not the largest possible deletion in the shortest time.
One closing recommendation. Change one setting at a time, then run a small, reviewable task to see the effect before you trust a broader cleanup or transfer. A single moved file teaches you where the destination path leads. A full sweep teaches you nothing until it is too late to adjust.